Sunday, 26 January 2014
Monday, 20 January 2014
Show Next & Previous Post Titles in Blogger with jQuery Navigation
 You can see that we have replaced Older/Newer Pagination buttons with Post titles. This trick is not a new one and already many developers proposed different solutions using JavaScript or using jQuery. We will also use jQuery but in a more neater and optimized fashion using jquery to fetch URL parameters instead of running long js queries. Blogger blogs are neither optimized nor structured in a user friendly manner. Same applies to default wordpress themes. The pagination buttons make no sense when placed at the bottom of comments container. Anything that provides usability to readers should be placed straight in front of eyes and not pushed down to the page where one would rarely scroll. After checking our analytics stats, I found thatNext/Previous buttons placed just at the bottom of post body generates more pageviews compared to placing them down below comments section. They become even more useful if instead of showing just buttons pointing to succeeding or preceding posts, show your readers the blog post titles. We will learn today how to create this professional looking pager navigation in blogspot blogs.
- DEMO: Scroll down to the bottom of this post

Add it to blogger
First we will add the necessary code for the new pagination and then we will remove the existing default buttons that appear below comment section
- Go To Blogger > Template
- Backup your template
- Click "Edit HTML"
- Search for ]]></b:skin>
- To change the black background and white font color of the selected area on mouse hover edit: background:#333333; and for font color edit: color: #ffffff;
- Use our Color generator tool for picking the hexadecimal color code
5. Now we will add some fancy Google web font called Oswald, so that our widget stands out. Kindly search for <head> and just below it paste the following code:
Note: Remove the bolded code if you have already added jquery library inside your template.
6. Next we will add the HTML code that will position the pager at the bottom of last paragraph on the blog post. Search for <data:post.body/>
7. Just below it paste the following HTML code:
Here I used a bit of jquery to fetch the data inside title tags. Since blogger only provides the option to switch between next and previous posts using URLs, therefore we needed jQuery to find the title classes using the heading tags and retrieve the data out of them. The title classes and heading tags may be different for custom blogger templates (you may need my help here by posting your blog urls so that I could tell you the correct title class used inside your blog)
In standard blogger templates the correct class is: .post h3.post-title and therefore I will be using the same inside the jquery code above.
- (Optional) The yellow and orange highlighted text can be replaced with any text you like. They will appear when a user is either viewing the most recent post or the last post on the blog.
8. Save your template and you are almost done! Visit your blogs and you will see the pager navigation working just perfectly! :)
Removing existing Next/Previous buttons
Now its time to prevent the default buttons from displaying below comment sections.
- Search for <b:includable id='nextprev'>
- You will see a big chunk of code below it that looks slightly similar to the code below:
3. All that you need to do is to enclose this code inside conditional codes as shown below:
4. Save your template and you are all done!
Now the default buttons will appear on homepage but not inside posts or static pages. If you wish to permanently delete them, then simply delete the big chunk code above and save your template.
Need Help?
- If you are looking for free professional set of png buttons for next/previous buttons then check our gallery: MBT Download Zone
Show Sharing Buttons Just Below all Post Titles in Blogs
 The widget today is an upgraded version of the sharing widget we earlier shared. It includespopular social networking buttons like Twitter, Facebook Like, Google Plus +1, Add this and Stumbleupon. I am using it in my blog as you can see. We will also customize here the Add This button and will add blog title inside it. You can easily customize it to change the background colors and widget overall look. It can be added to both Blogger and Wordpress. It has great importance in boosting blog traffic through the shares made through these buttons which will circulate in social media and help you enjoy a long lasting referenced traffic. Lets add these valuable buttons to your blog.
Add Social Sharing Buttons Below Post Titles
I am sharing here the method for blogspot blogs. If you are using Wordpress then you may please add the code shared below inside your template by going to template section.
Follow the steps below if you use Blogger.
- Go To Blogger > Design > Edit HTML
- Backup your template
- Click on the box at top right that says "Expand Widget Templates"
- Then search for <data:post.body/>
- Just above it paste the following code,
Make these changes:
- To change the background color of the container edit #FEE6E6
- Change MY BLOGGER TRICKS with your blog title so that it appears on the add this button upon mouse hover. As shown below:

5. Note: skip this step if you have already added a Google+ button somewhere in your blog. Search for ]]></b:skin> and just below it paste the following code:
6. Save your template and say bingo!
Visit your blogs and see it appearing only on post pages and not the homepage. If you wish to show it even on your homepage then simply delete the two purple lines from the code above.
Want more?
If you want more variations of the same widget then kindly check our social sharing widget collection. Do let me know if you needed help. Peace pals! :)
Do You Like This Story" - A Widget For Blogs Version-2
o You Like This Story" - A Widget For Blogs Version-2
 Posted by Mohammad Mustafa Ahmedzai on 3/11/2012
 I just took a simple HTML div box and inserted inside it Facebook Like and send button along with Twitter follow button to create version 2 of one of our popular sharing widgets i.e. "Do You Like This Story" The first version included social media sharing buttons along with a subscription box and Facebook like button and it was designed to be added just at the bottom of blog posts but this version is kept simple and clean and designed to be added just below blog post titles in sub pages. This plugin would work with both BlogSpot and wordpress blogs. The tutorial below is aimed for blogger users only. Wordpress users may simply add the code in step#5 without the purple lines just below their post titles manually. Lets first see a demo:
Advantages of This Sharing widget
Since the area just below post titles has highest page impressions therefore it will always catch the attention of every single visitor thus leading to an increase in the number of your Facebook and Twitter followers. You can even set the like button to link to your Fan Page in order to increase your Fan following massively. We will learn below how to code it.
Add This Widget To Blogger
Follow these easy steps:- Go To Blogger > Design > Edit HTML
- Back up your template
- Click the "Expand Widget templates"
- Search for this
- Replace mybloggertricks with your twitter username
- By default the like button will count hits for the post link only. This will cause your individual posts to be liked and circulated via Facebook. But if you wish to increase your Fan followers then you can fix the like button to count hits for Fan Page only by replacing the yellow highlighted code with the following:
- Replace bloggertricks with your Facebook username. If you don't have a Facebook username then get one from here.
Visit any of your blog posts to see it hanging just perfectly below post title. The widget is coded such that it will appear only in post pages and not on homepage. If you wish to show it even on homepage then delete the purple bolded lines of code.
Need help?
If you need any help related to its customization then let me know. I have set the background colours such that it will suit templates with light backgrounds but if you are using a dark background and wish to change the font colours and borders of this sharing widget then let me know so that I could guide you via comments. Peace and blessings pals! :)
Collapsible JQuery Stickybar for blogs - Version5
We have published so far 3 different versions of a sticky bar as a custom design to Hellobar. It appears at the top of your website or blog to attract visitors towards an important announcement, ad or update. The previous versions included social media buttons and a close functionality. This widget uses Jquery to create a collapsible slide panel that can be expanded or collapsed. Any important message or blog update can be inserted inside the announcement box no matter how long it may be, the message will appear only once the visitor clicks the slidepanel. I made sure it looks neat and clean and may not occupy big space therefore this latest Jquery script helped me to add the slide functionality to it thus giving birth to an entirely useful and cool blog widget. Kindly view a demo first,
Previous versions:
Add Jquery Slidepanel To Blogger
- Go To Blogger > Design > Edit HTML
- Backup your template
- Search for <body> and just below it paste the following code:
- To change the background and border colour of the Message box edit 252636
- To change the background and border colour of the Slide box edit 252636
- To change the text inside Slide box edit SHOW ANNOUNCEMENT ▼ . The weird number at the end is the ASCII code for the triangle icon.
- To write a Message or announcement simple replace the yellow highlighted text with any message you like.
4. Save your template and you are all done!
Visit your blogs to see it sticking at the top of your blog just perfectly.
author bok at every post

The steps are kept simple so you will find it really interesting to apply.
- Go to Blogger > Template
- Backup your template
- Click Edit HTML
- Click Proceed
- Then Click Expand Widget Templates
- Search For ]]></b:skin>
- Just above it paste the following CSS code,
To change color of the text "About author" edit color:#666666
8. Next Search for data:post.body
9. Just below it paste the following code:
All steps are self explanatory. you just need to fill the bolded parts with correct requirement details. There is one thing that needs care.
- Replace AUTHOR NAME with the account name of the guest author. This name should match exactly the name appearing on his posts. See the screen shot below:

10. Finally save your template and you are all done!
Visit your blog and check the post of any of your co-authors. You will find his bio appearing just perfectly at the bottom of all articles published by him. You can even create an author box for yourself by simply replacing the AUTHOR NAME , profile pic and bio to that of yours.
Bookmark us widget
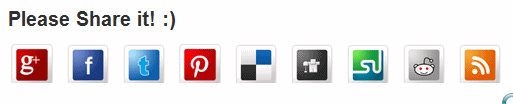
This gadget can be inserted easily in any blogging platform by making simple changes to the Sharing links. Blogger users can follow these easy steps to install flipper on their blogs:
- Go To Blogger > Template
- Back up your template
- Click Edit HTML > Proceed
- Click the Expand Widget Templates box
- Search for <data:post.body/>
- Just below it paste the following HTML code
- To change the color of the text that appears on top of widget edit #333333
- If in case you wanted to remove some icons then just delete its code. For example if we wish to remove the Digg icon from the list then we just need to delete the code:
Subscribe to:
Posts (Atom)